> ## Documentation Index
> Fetch the complete documentation index at: https://docs.cloudtype.io/llms.txt
> Use this file to discover all available pages before exploring further.
# OpenClaw
## 템플릿 선택
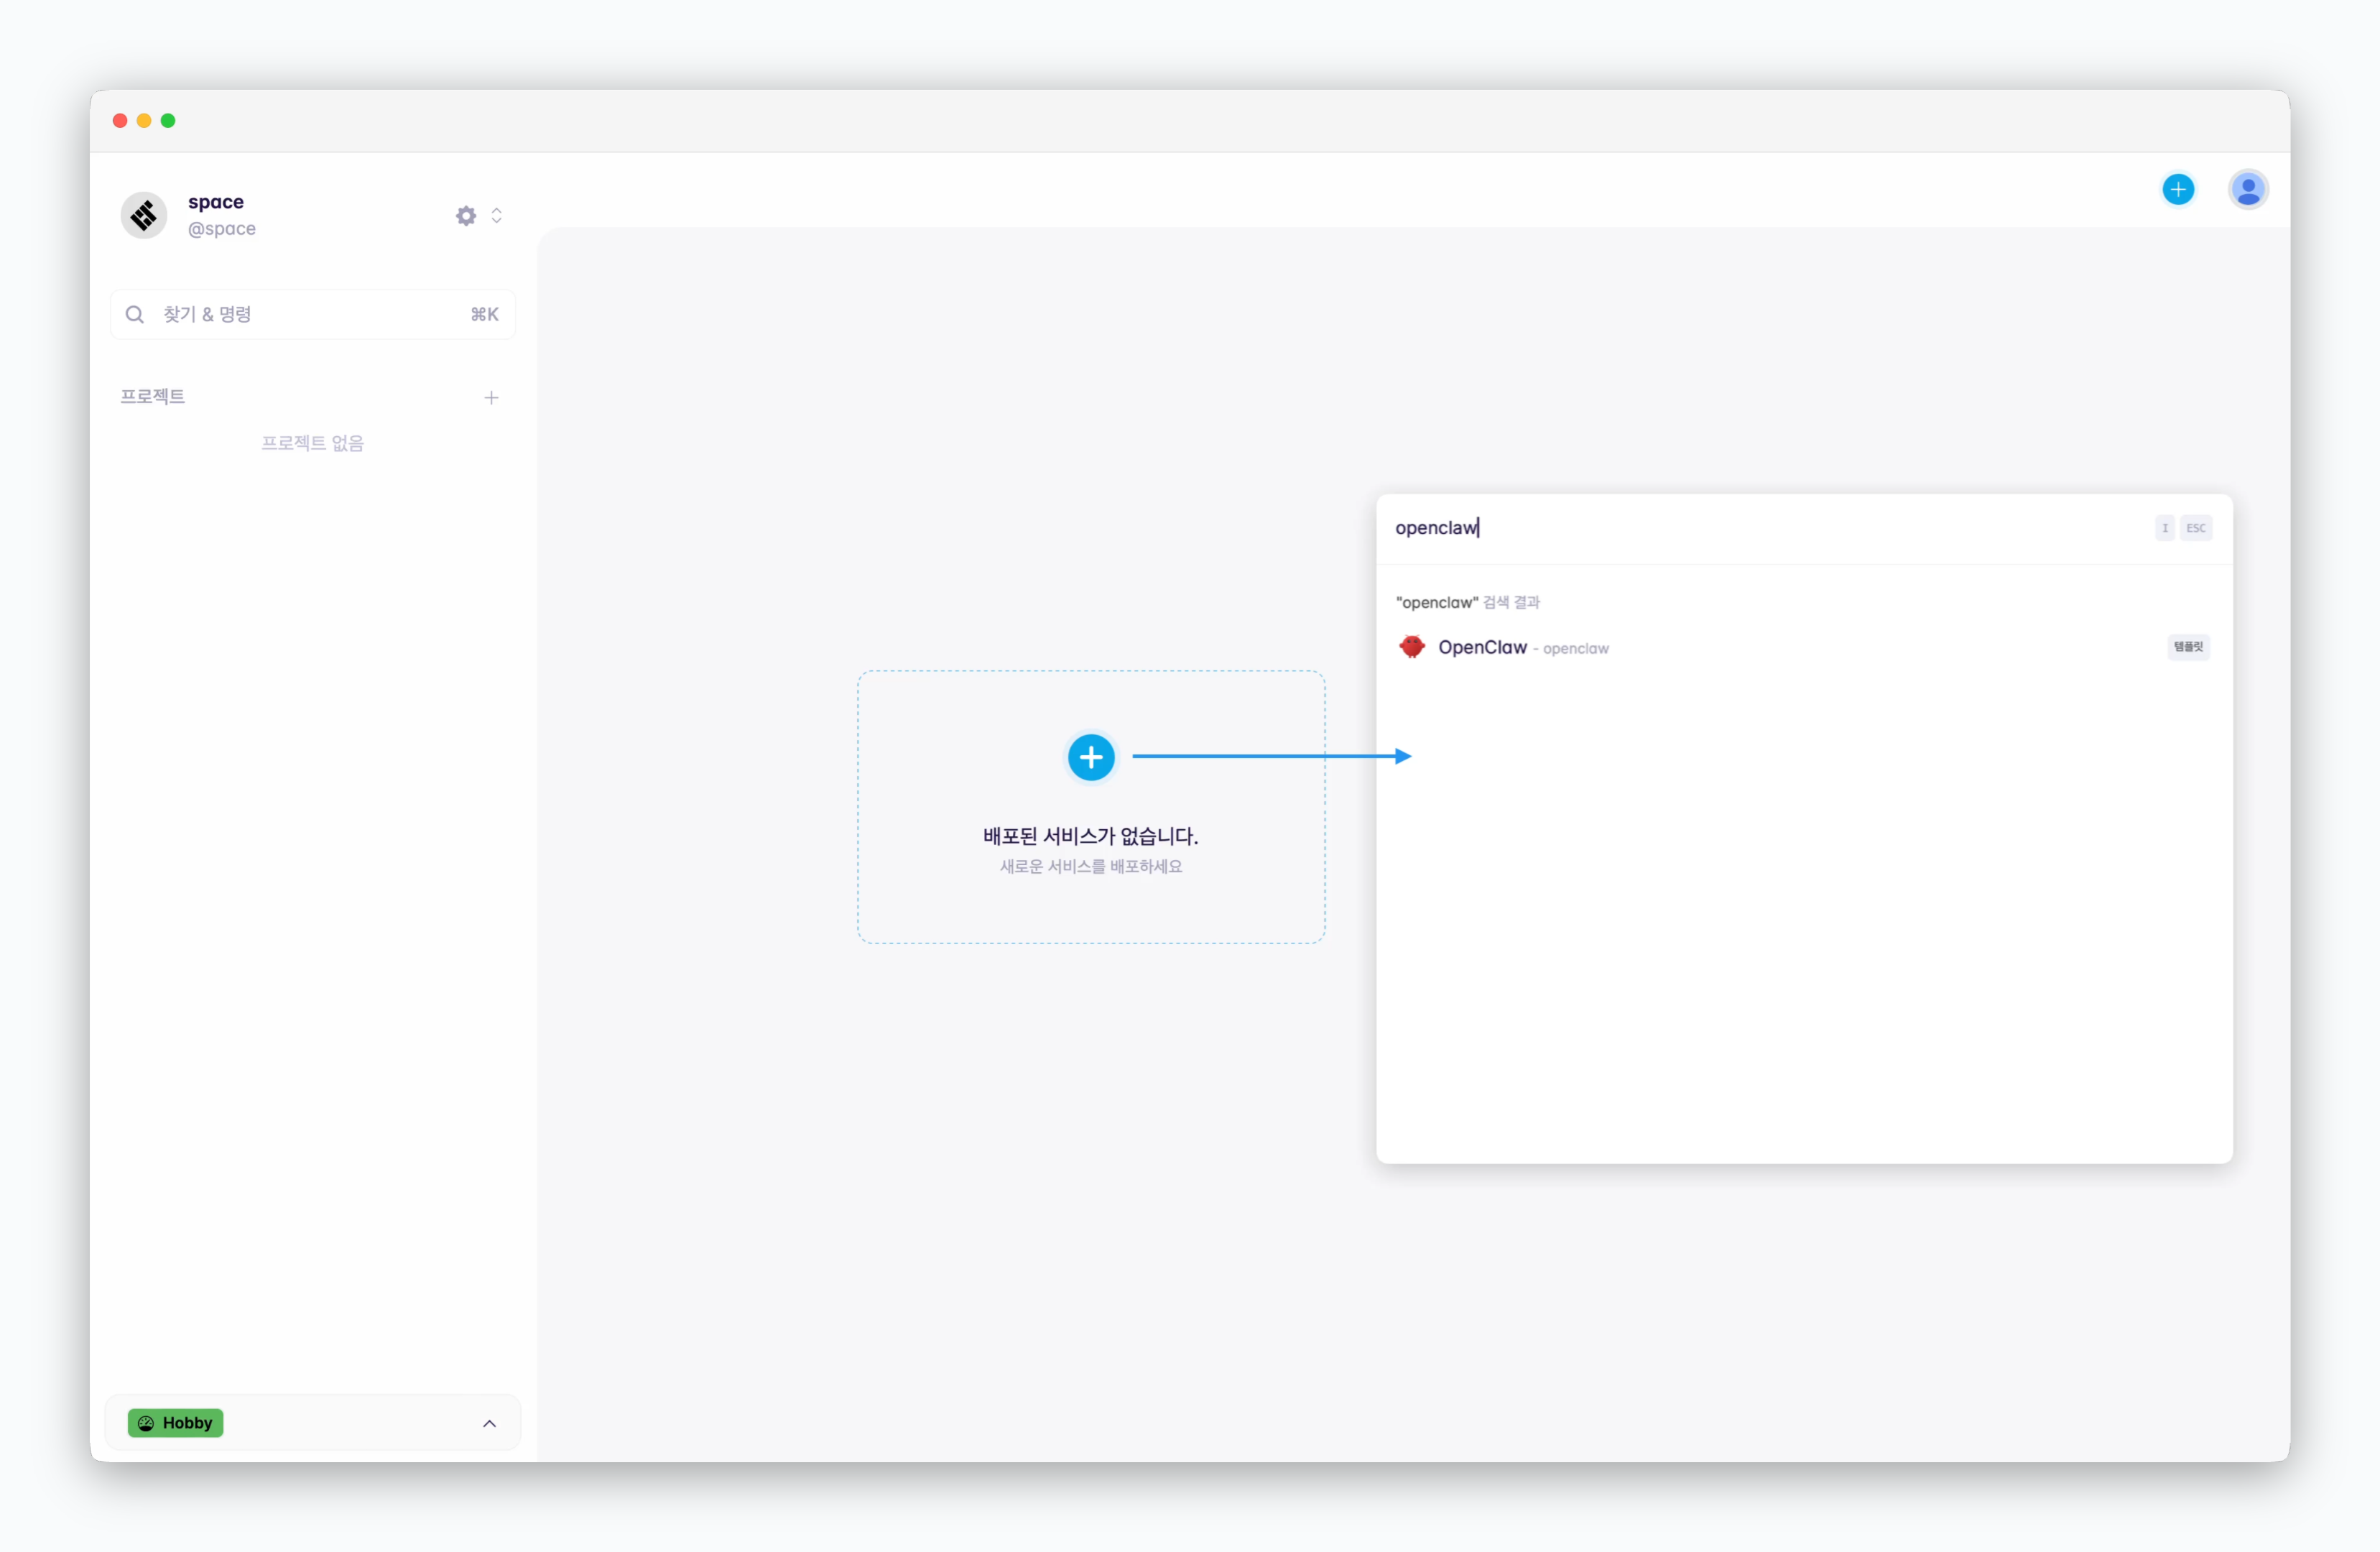 > 대시보드의 또는 `⌘ + K` 로 생성되는 배포창에서, openclaw 템플릿을 검색하고 선택하세요.
## 배포하기
> 대시보드의 또는 `⌘ + K` 로 생성되는 배포창에서, openclaw 템플릿을 검색하고 선택하세요.
## 배포하기
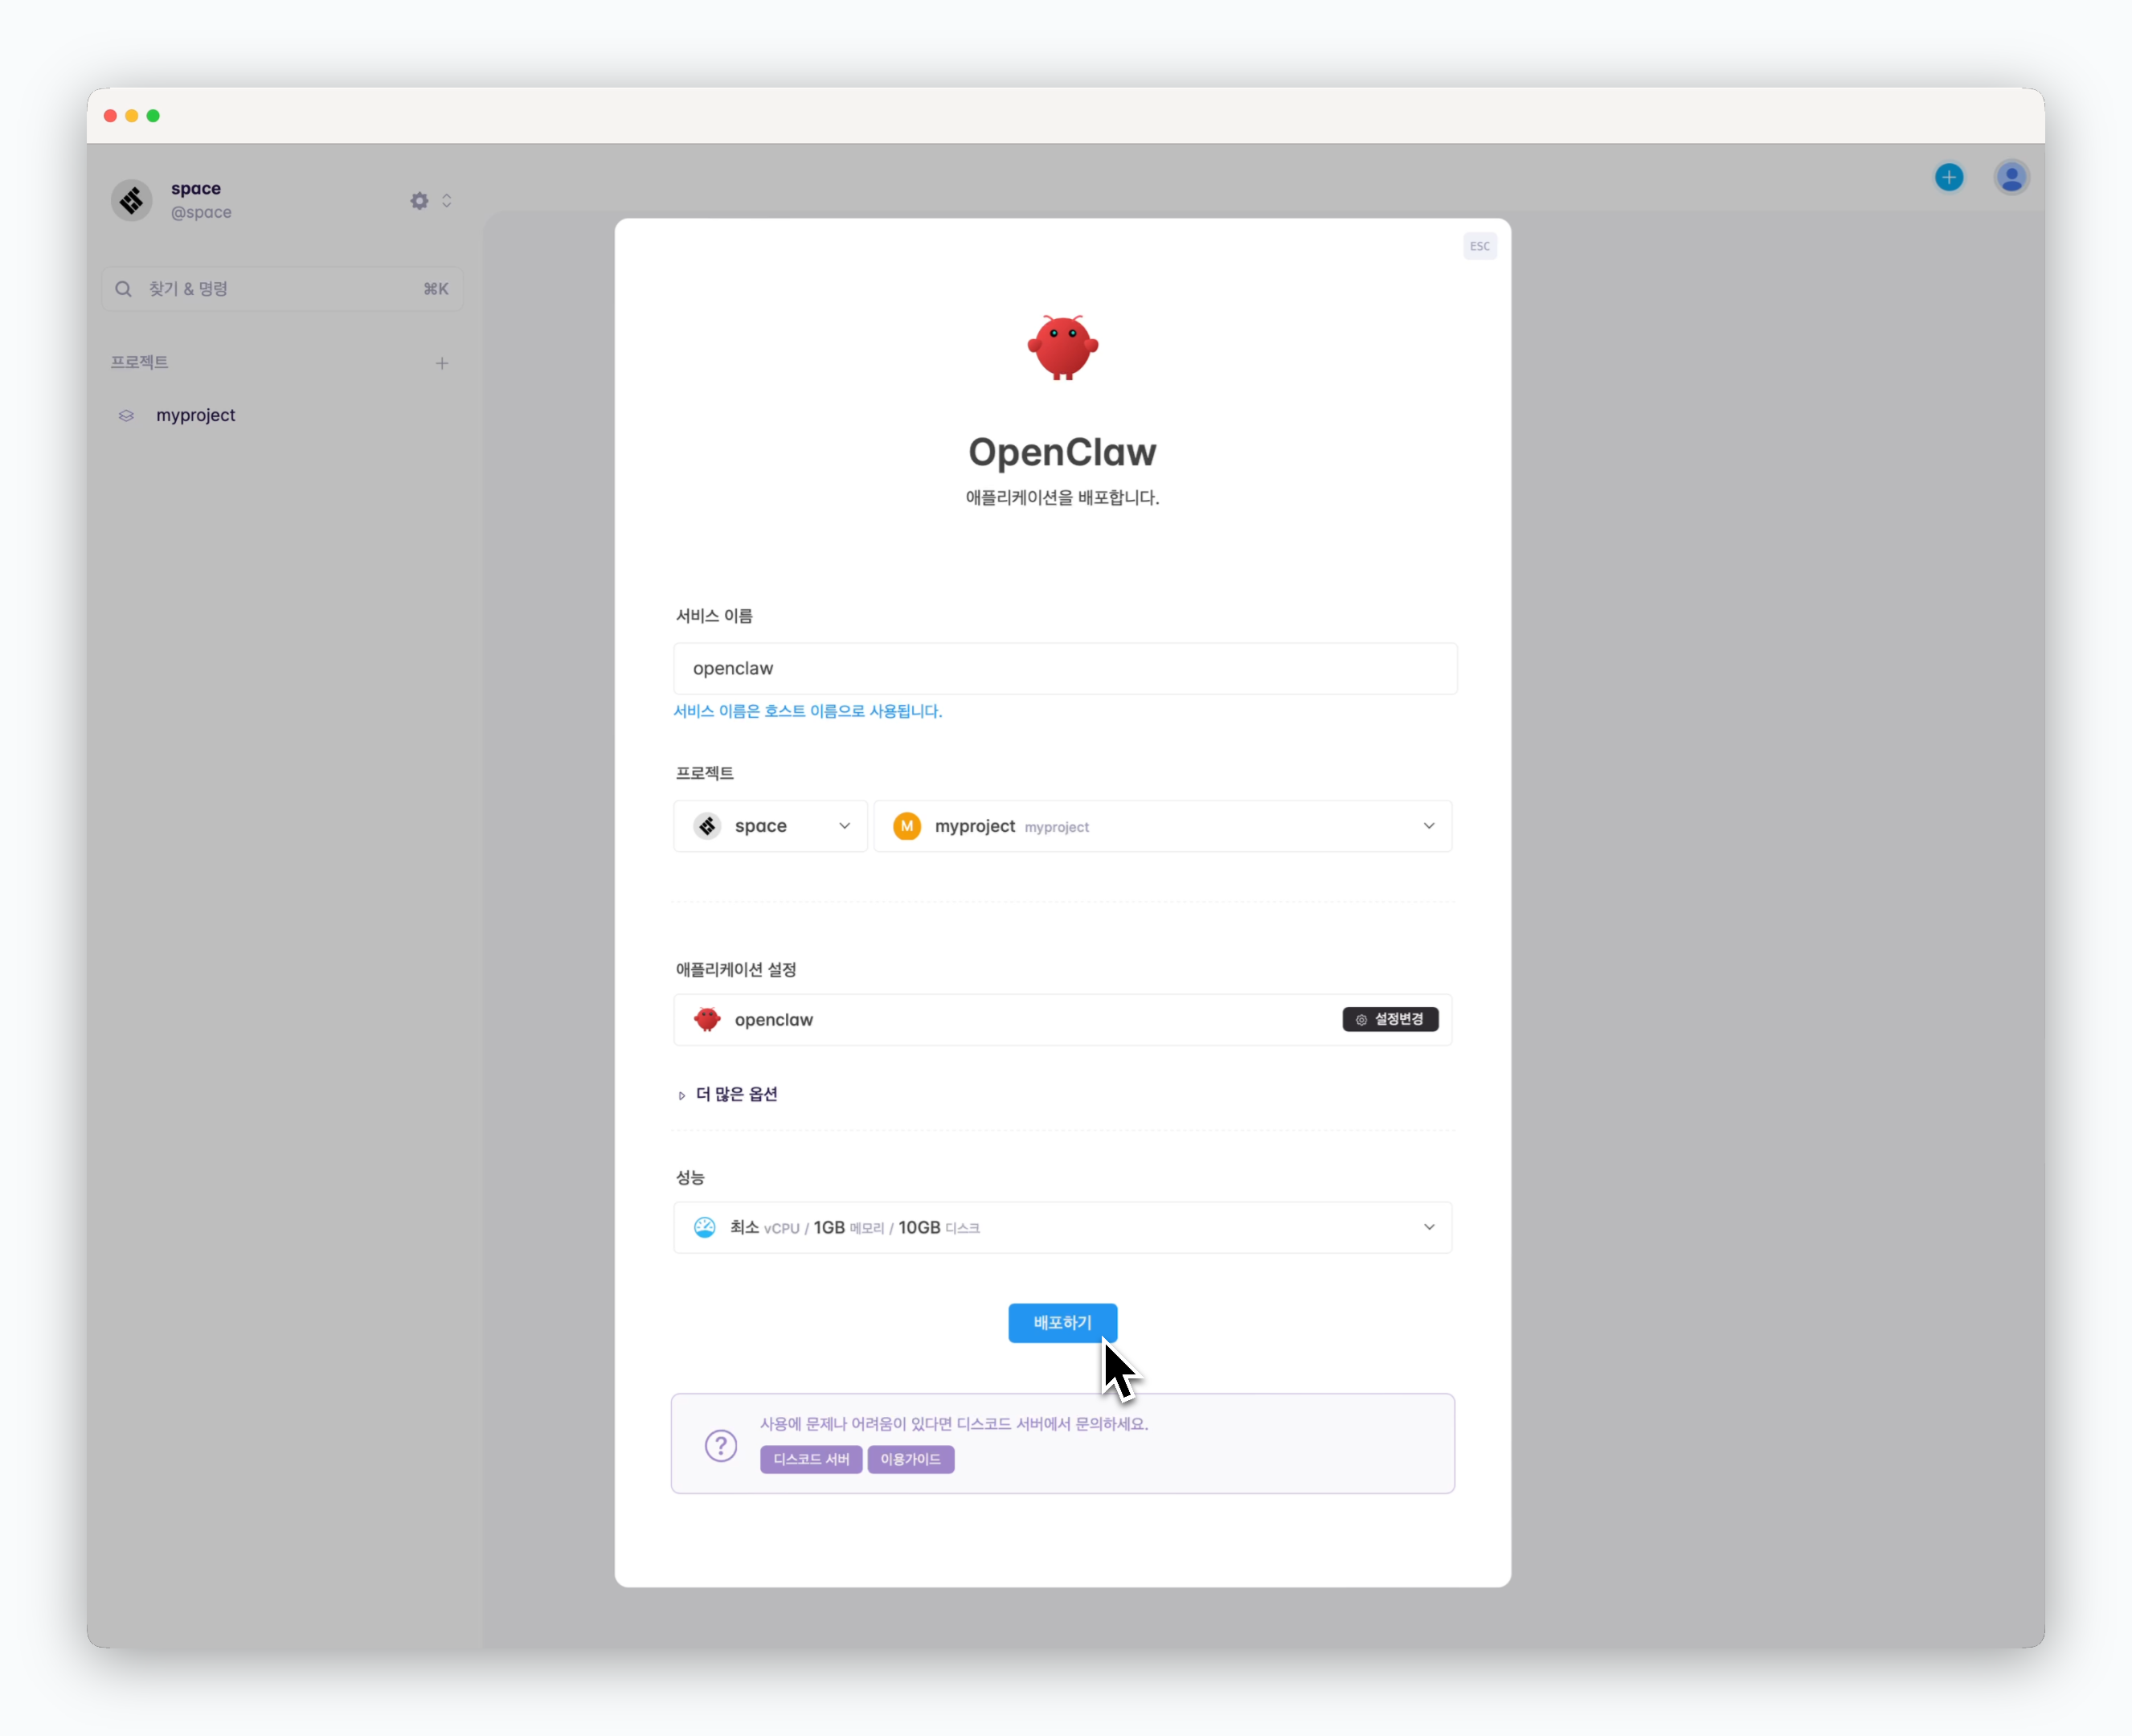 > 리소스를 설정하고 `배포하기` 버튼을 클릭하세요.
더 많은 옵션을 클릭하면, 환경 변수 주입, 게이트웨이 토큰 설정, API expose 등을 설정할 수 있습니다.
## 접속과 온보딩
> 리소스를 설정하고 `배포하기` 버튼을 클릭하세요.
더 많은 옵션을 클릭하면, 환경 변수 주입, 게이트웨이 토큰 설정, API expose 등을 설정할 수 있습니다.
## 접속과 온보딩
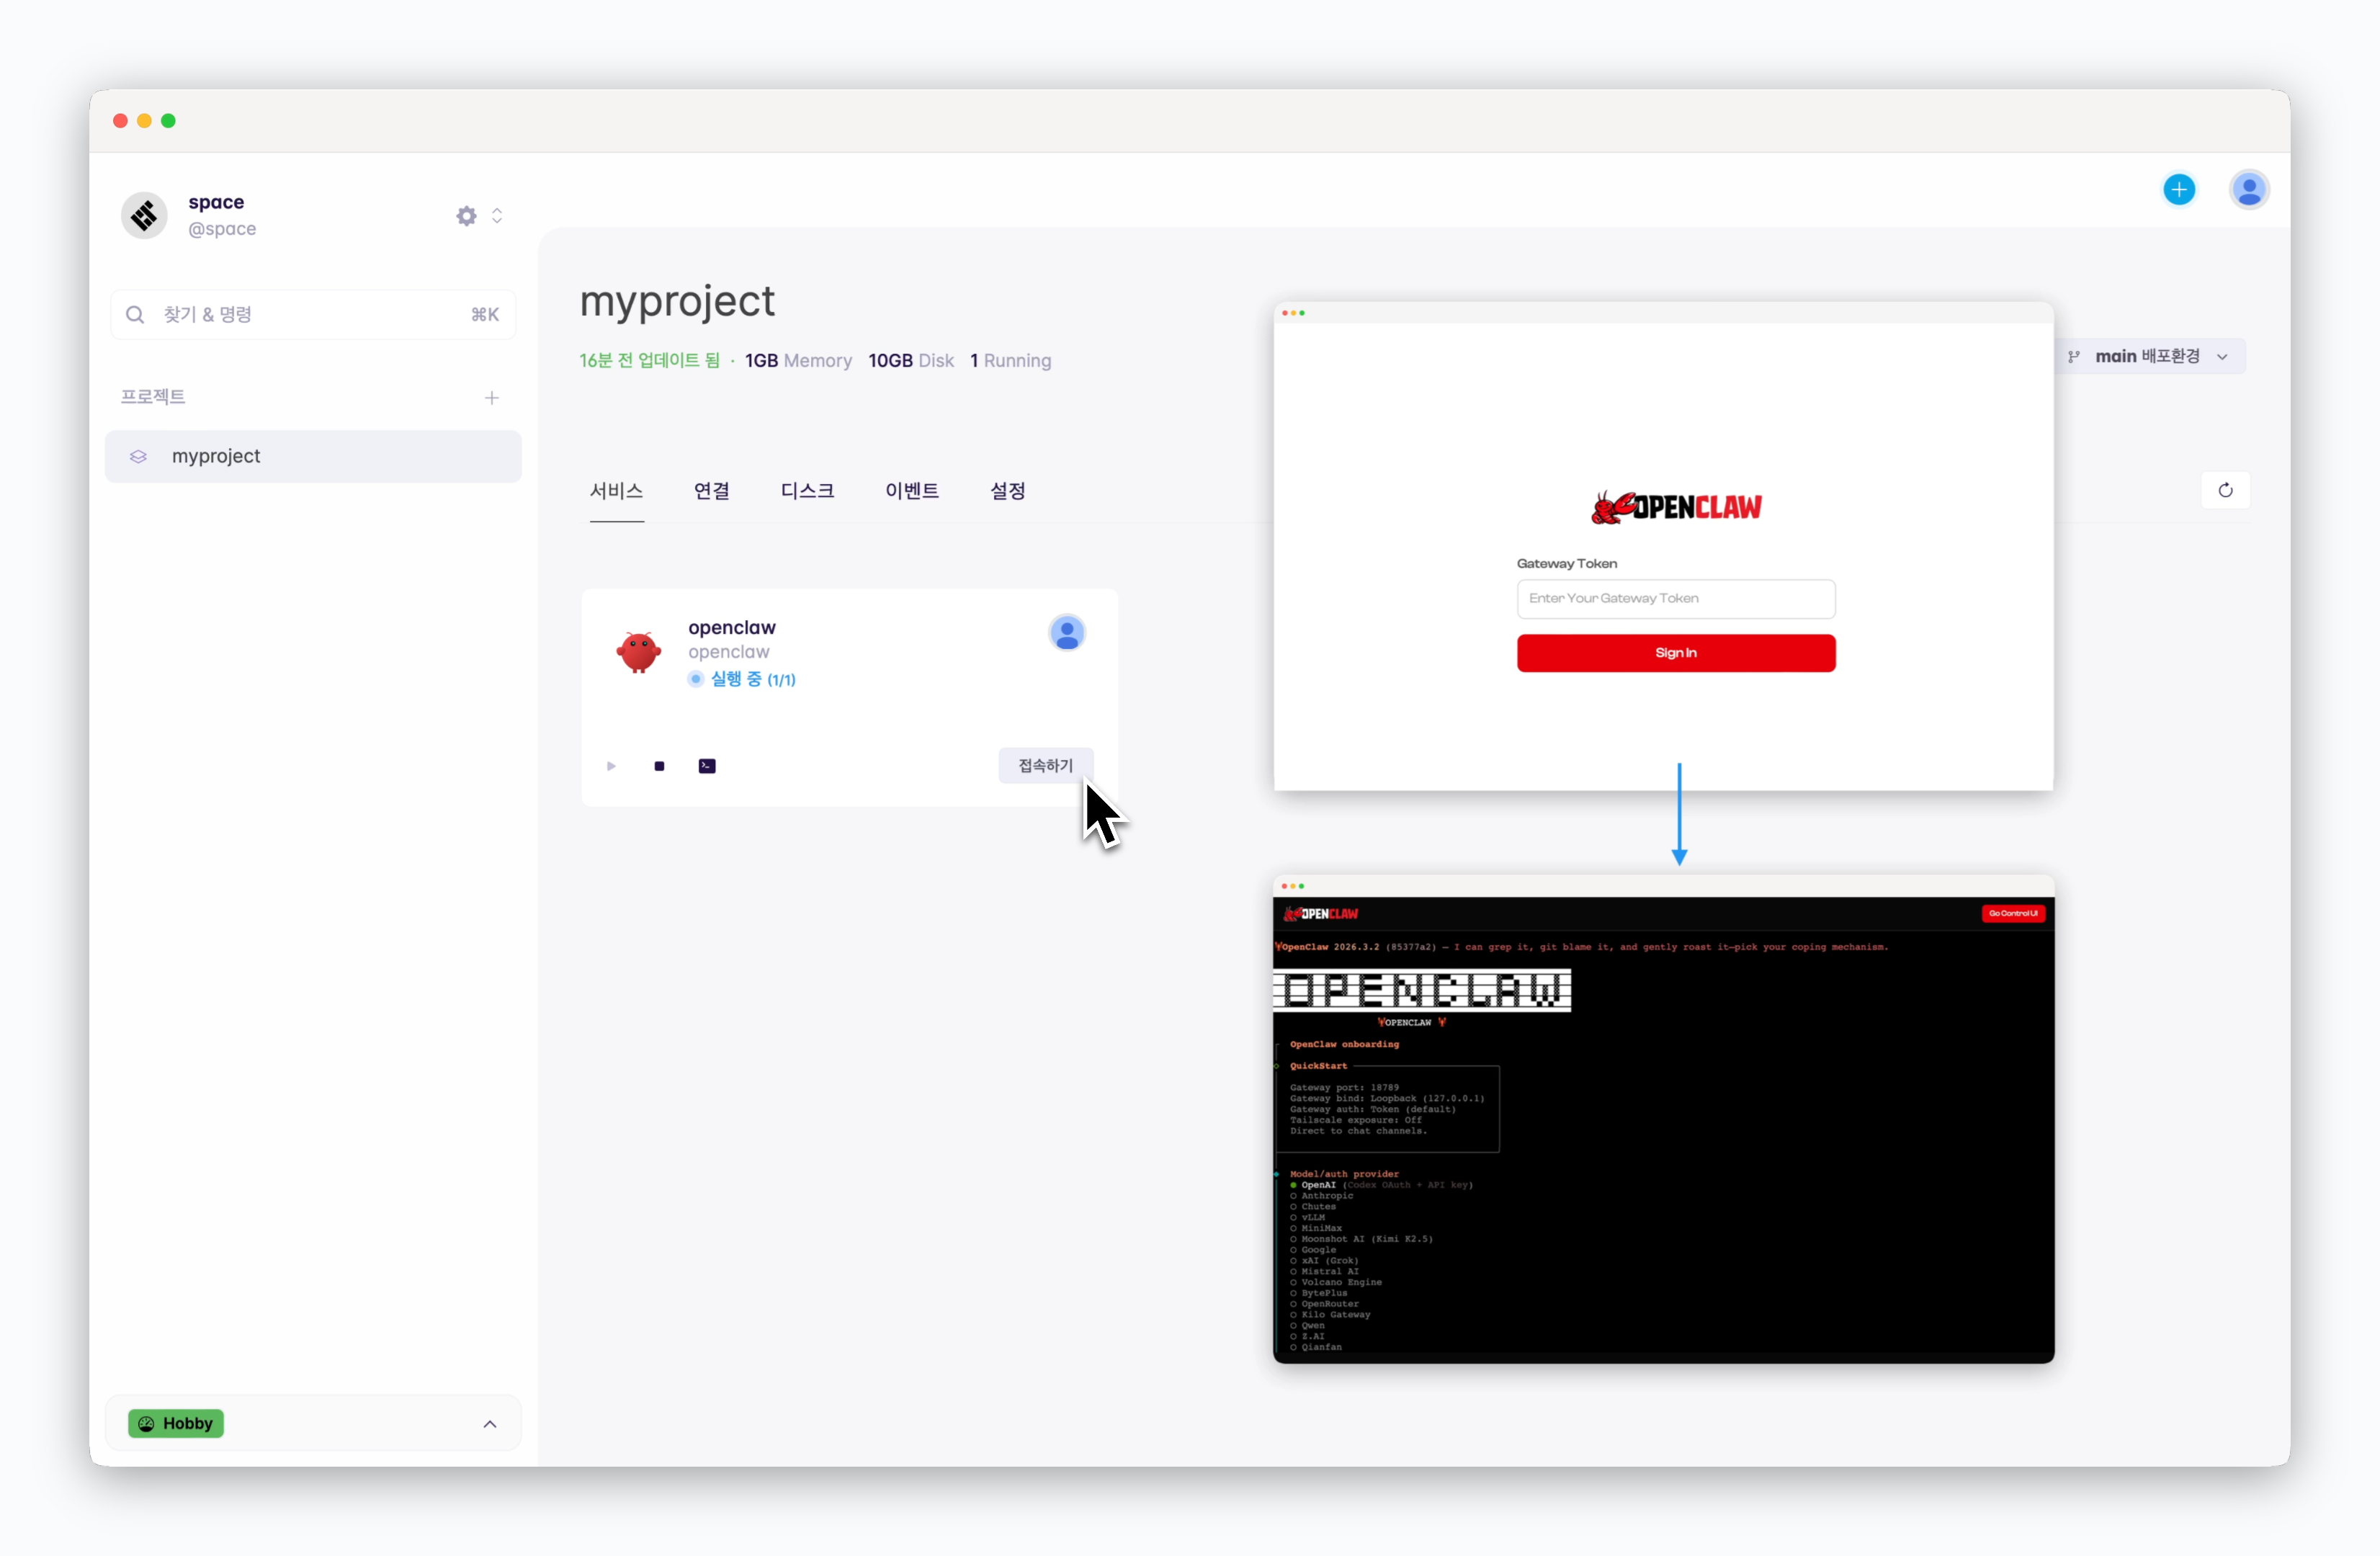 > '접속하기' 버튼을 클릭하고 게이트웨이 토큰 값을 입력하면, 오픈클로 온보딩 과정을 진행할 수 있습니다.
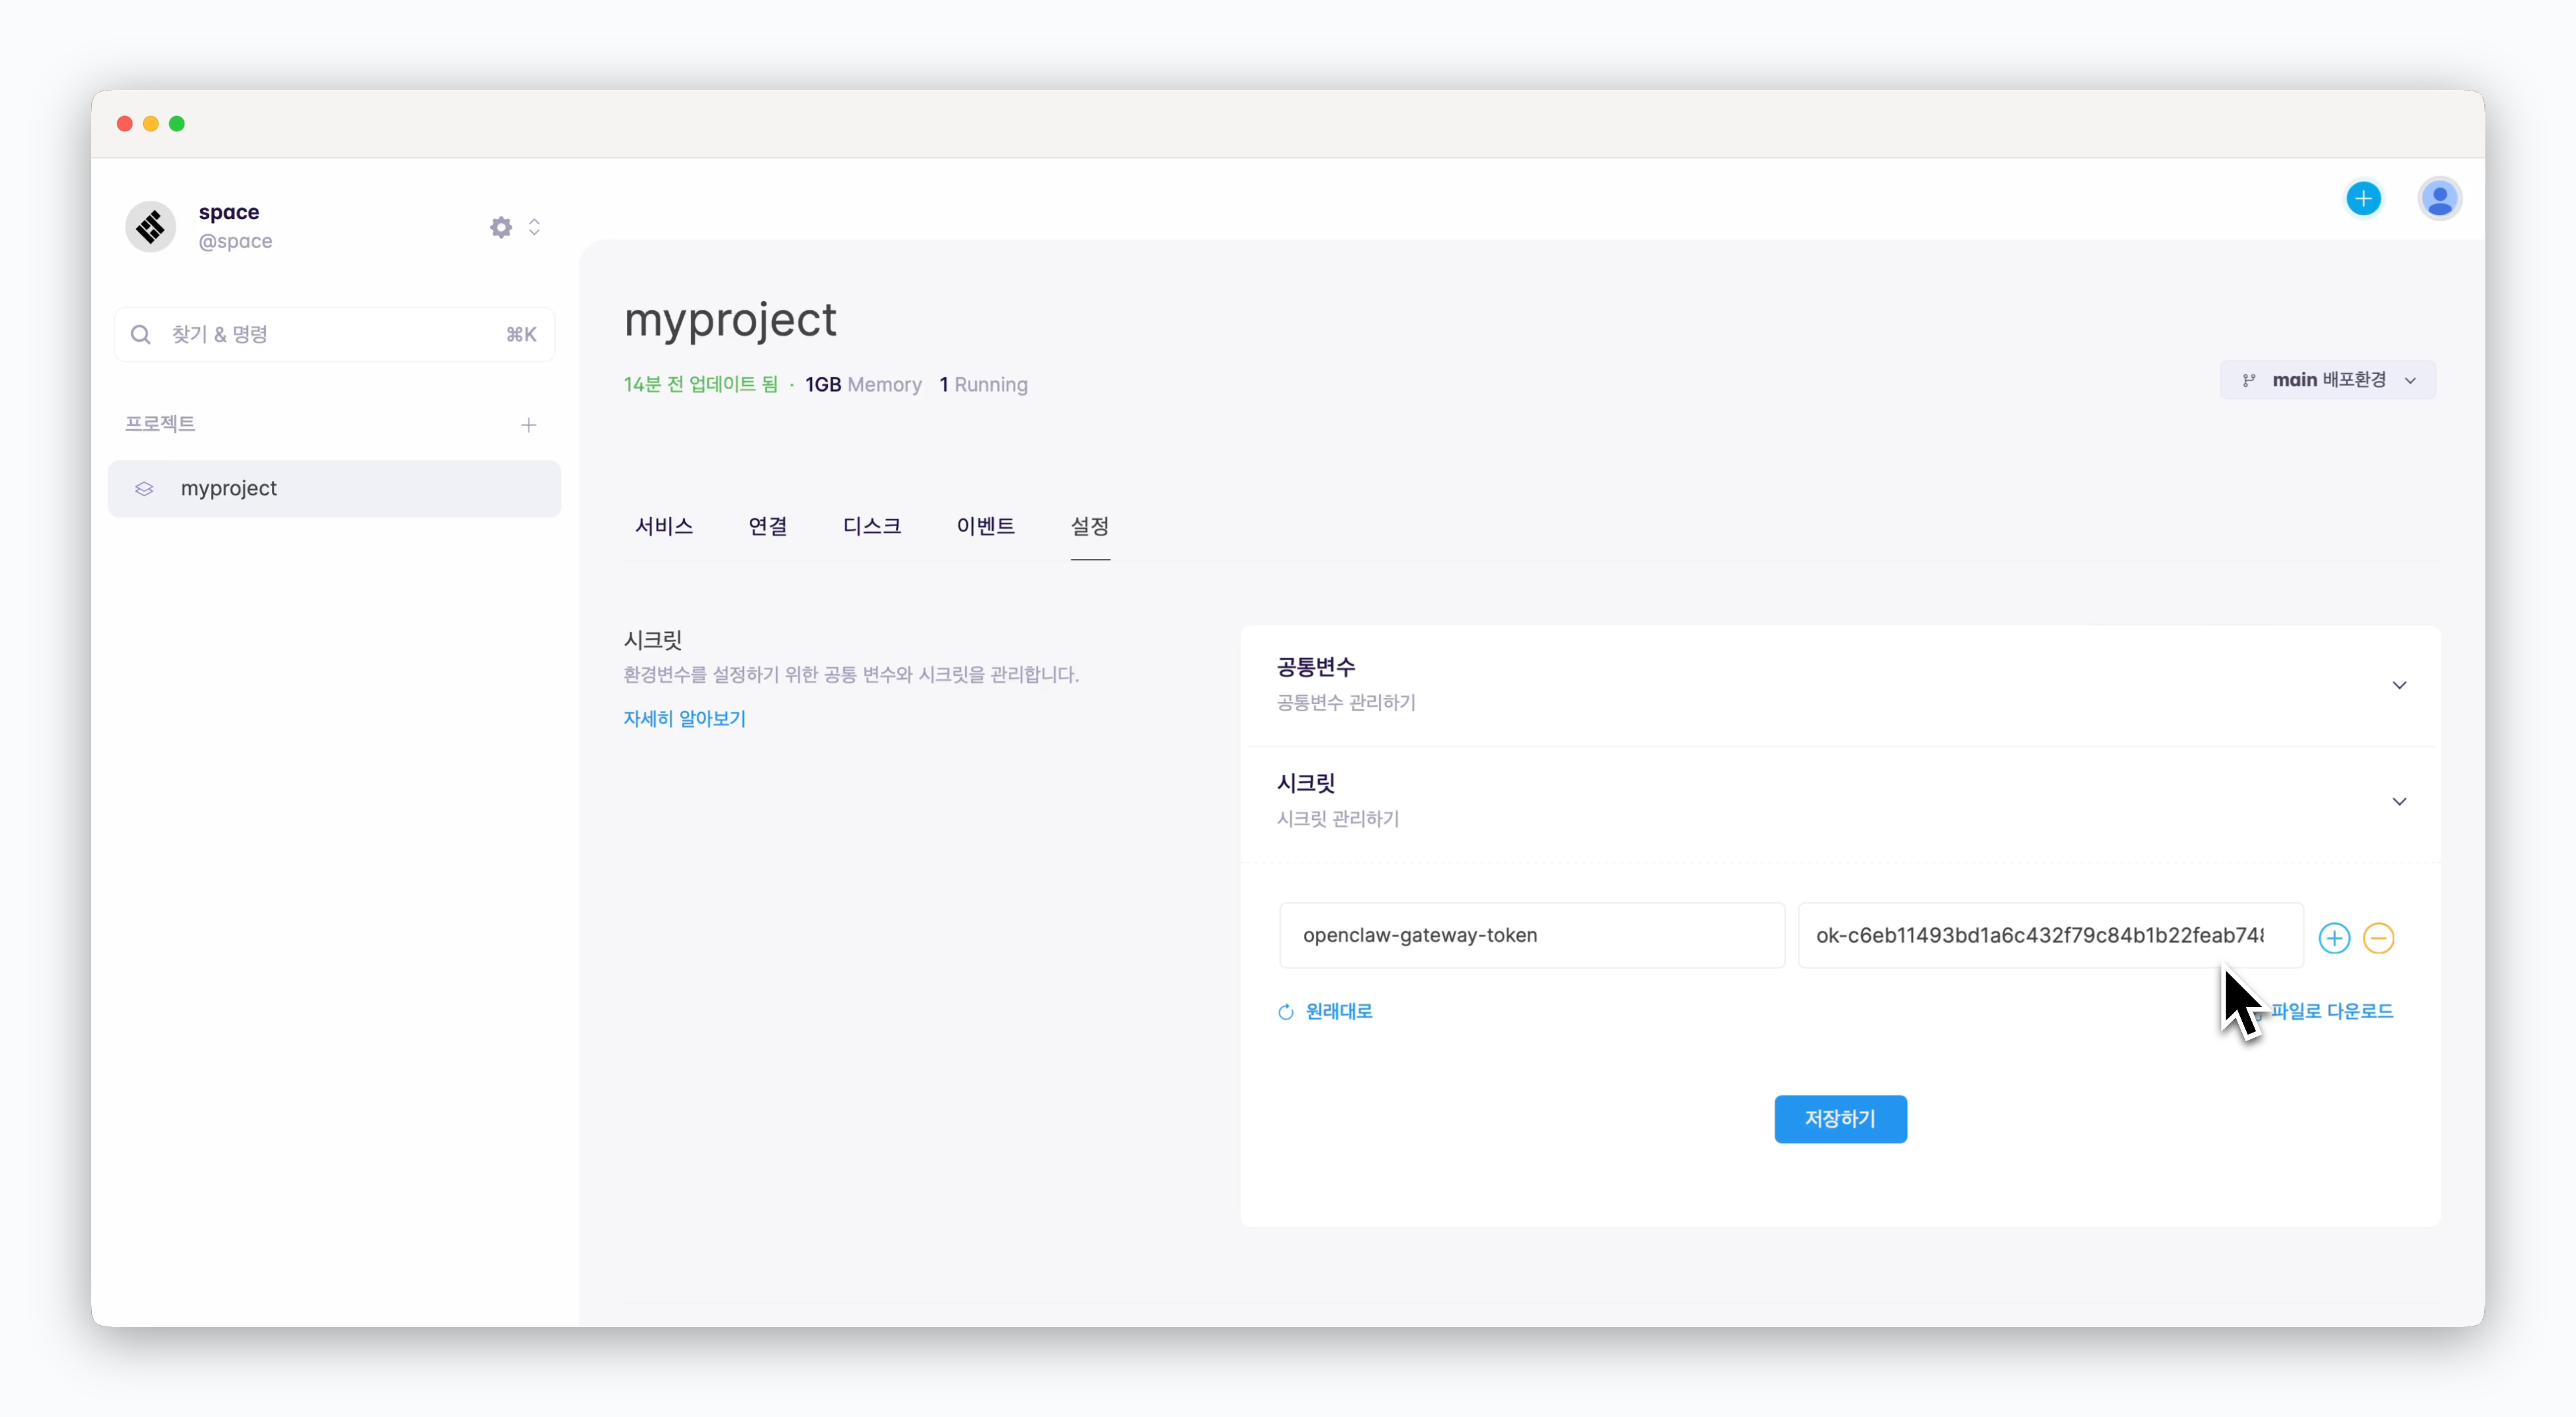
게이트웨이 토큰은 아래의 이미지처럼 프로젝트 설정탭의 시크릿 항목에서 조회할 수 있습니다. **배포과정에서 설정하지 않은 경우 난수로 자동 설정됩니다.**
> '접속하기' 버튼을 클릭하고 게이트웨이 토큰 값을 입력하면, 오픈클로 온보딩 과정을 진행할 수 있습니다.
게이트웨이 토큰은 아래의 이미지처럼 프로젝트 설정탭의 시크릿 항목에서 조회할 수 있습니다. **배포과정에서 설정하지 않은 경우 난수로 자동 설정됩니다.**
 ## 환경 변수 추가 등 설정변경
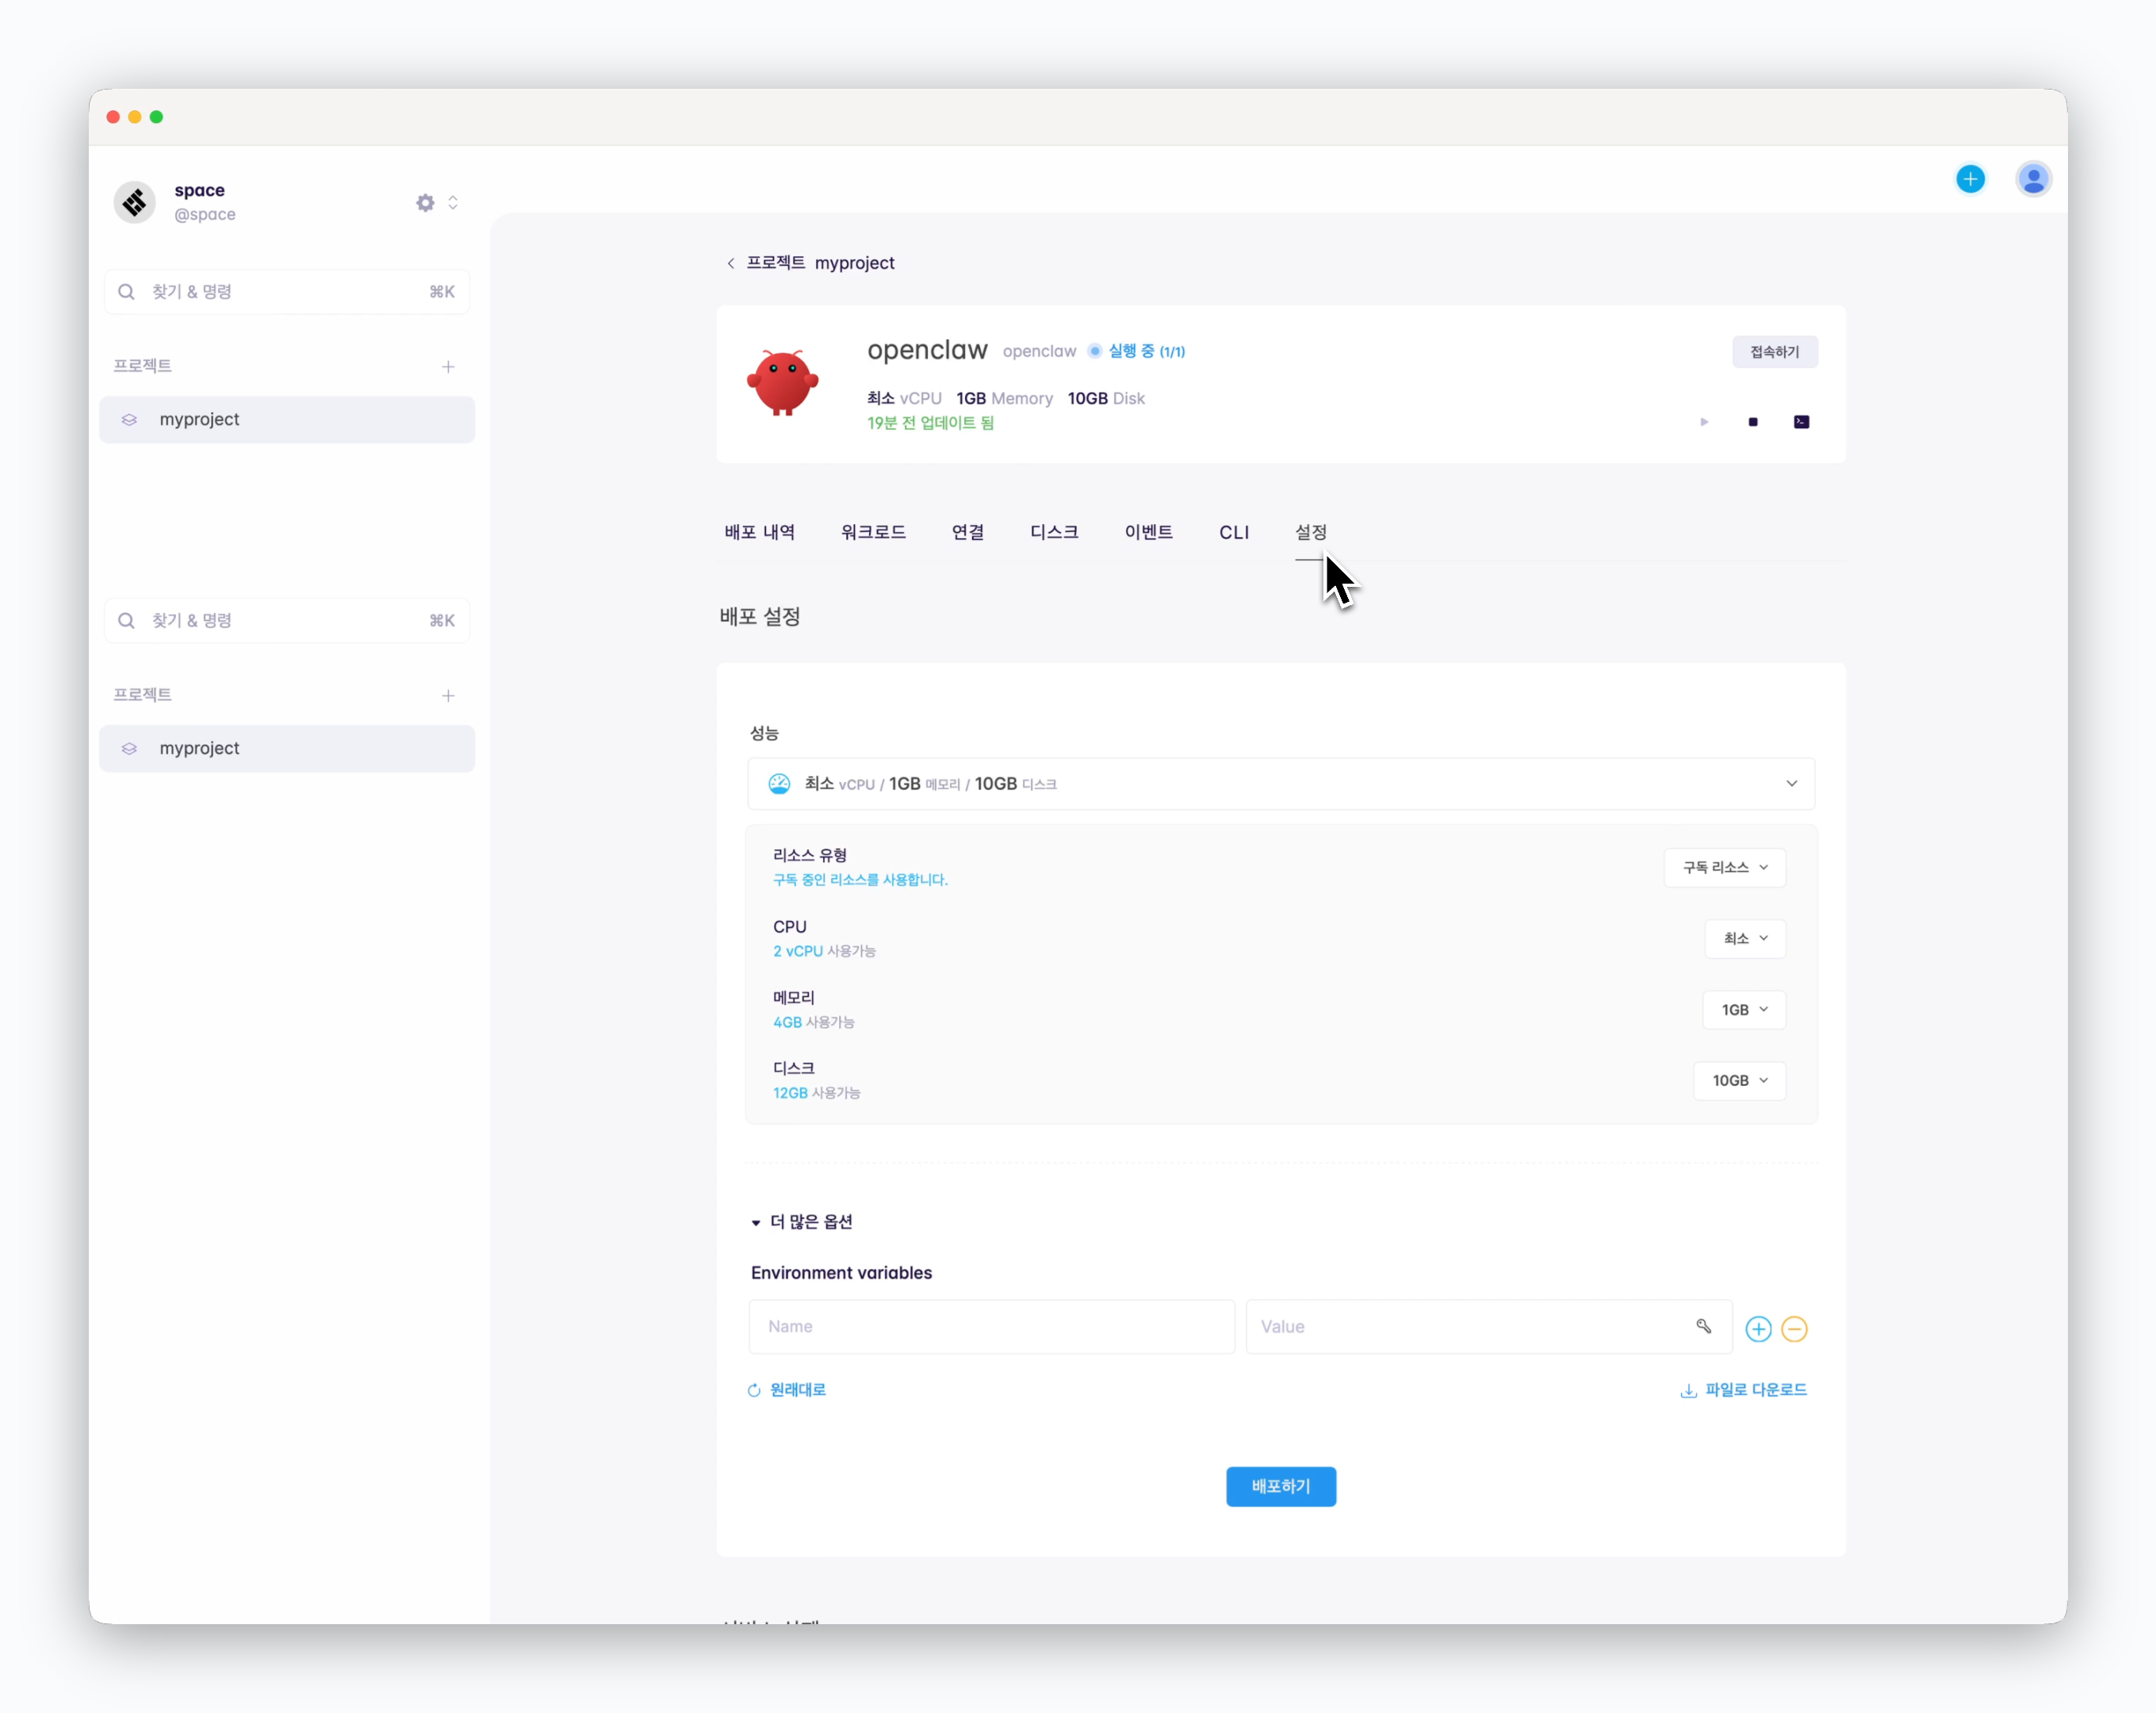 > 서비스 상세페이지의 설정탭에서 vCPU, 메모리 등의 리소스를 변경하거나, 더 많은 옵션을 클릭해서 환경 변수를 주입할 수 있습니다.
설정 변경 후, 하단의 배포하기 버튼으로 재배포해야 변경된 설정이 적용됩니다.
AI 모델에 따라 민감한 정보는 환경 변수로 주입해달라고 요청하는 경우가 많습니다. 이러할 경우 위의 방식으로 환경 변수를 추가할 수 있습니다.
> 서비스 상세페이지의 설정탭에서 vCPU, 메모리 등의 리소스를 변경하거나, 더 많은 옵션을 클릭해서 환경 변수를 주입할 수 있습니다.
설정 변경 후, 하단의 배포하기 버튼으로 재배포해야 변경된 설정이 적용됩니다.
AI 모델에 따라 민감한 정보는 환경 변수로 주입해달라고 요청하는 경우가 많습니다. 이러할 경우 위의 방식으로 환경 변수를 추가할 수 있습니다.